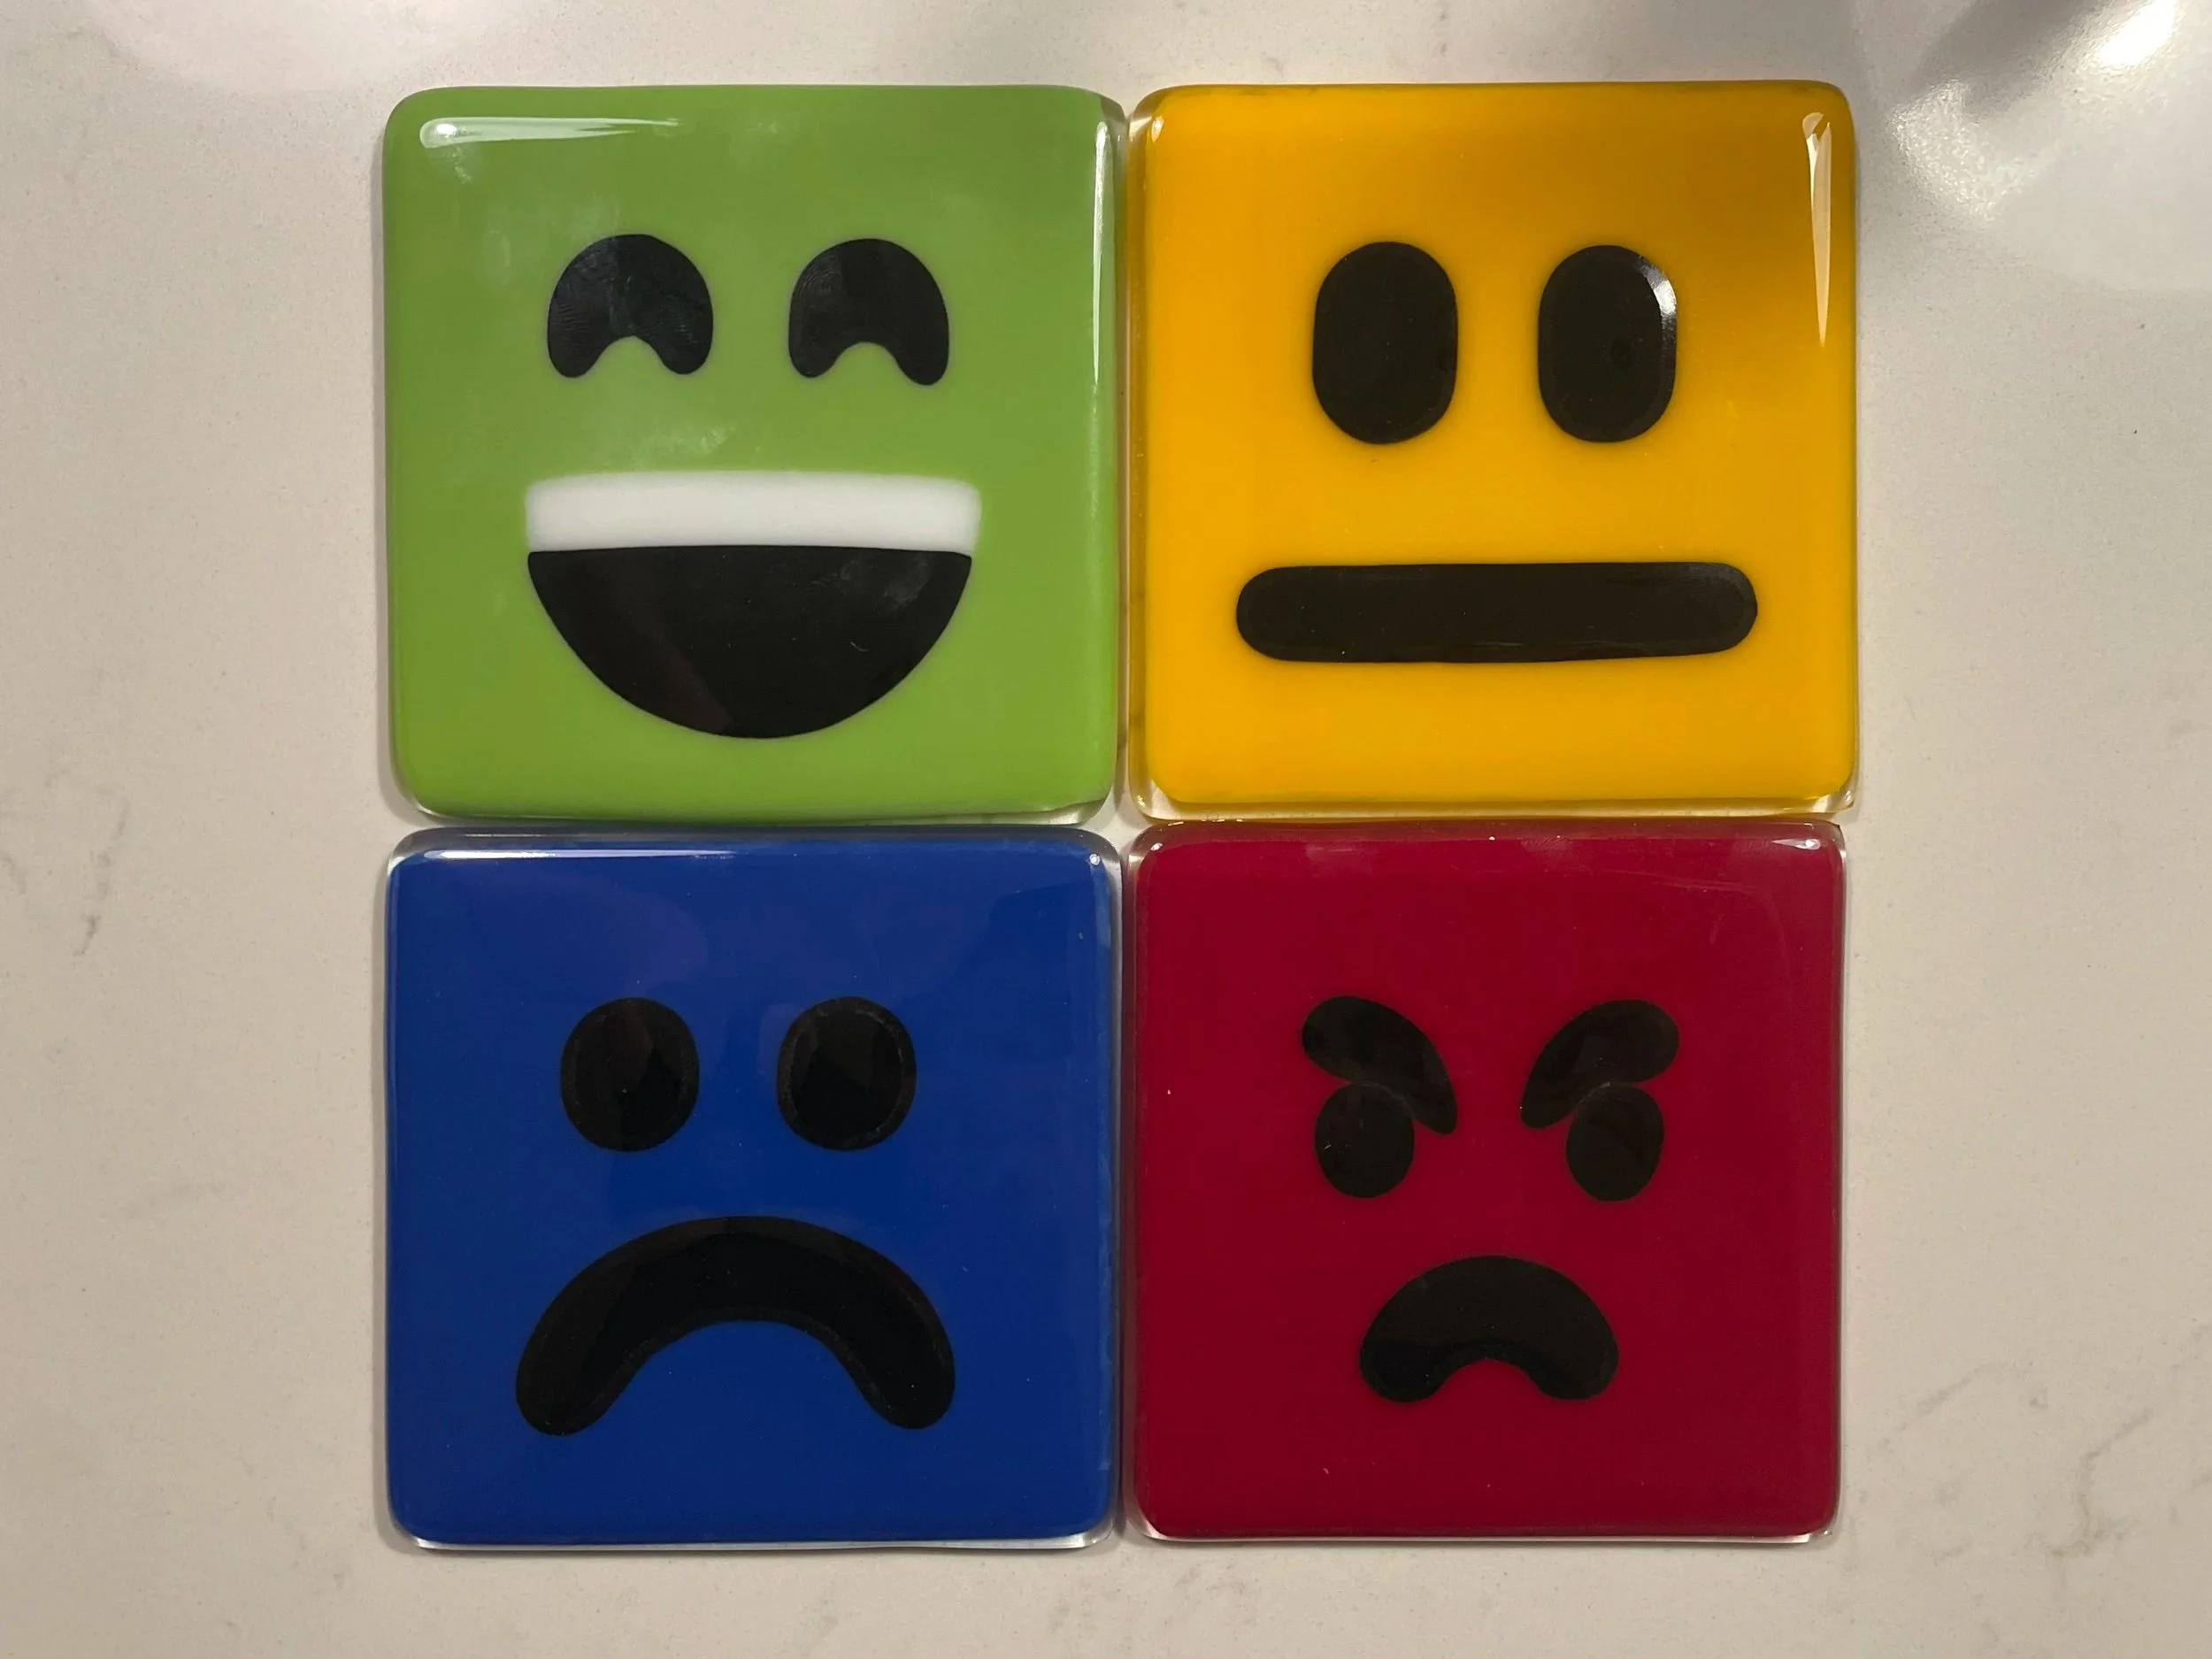
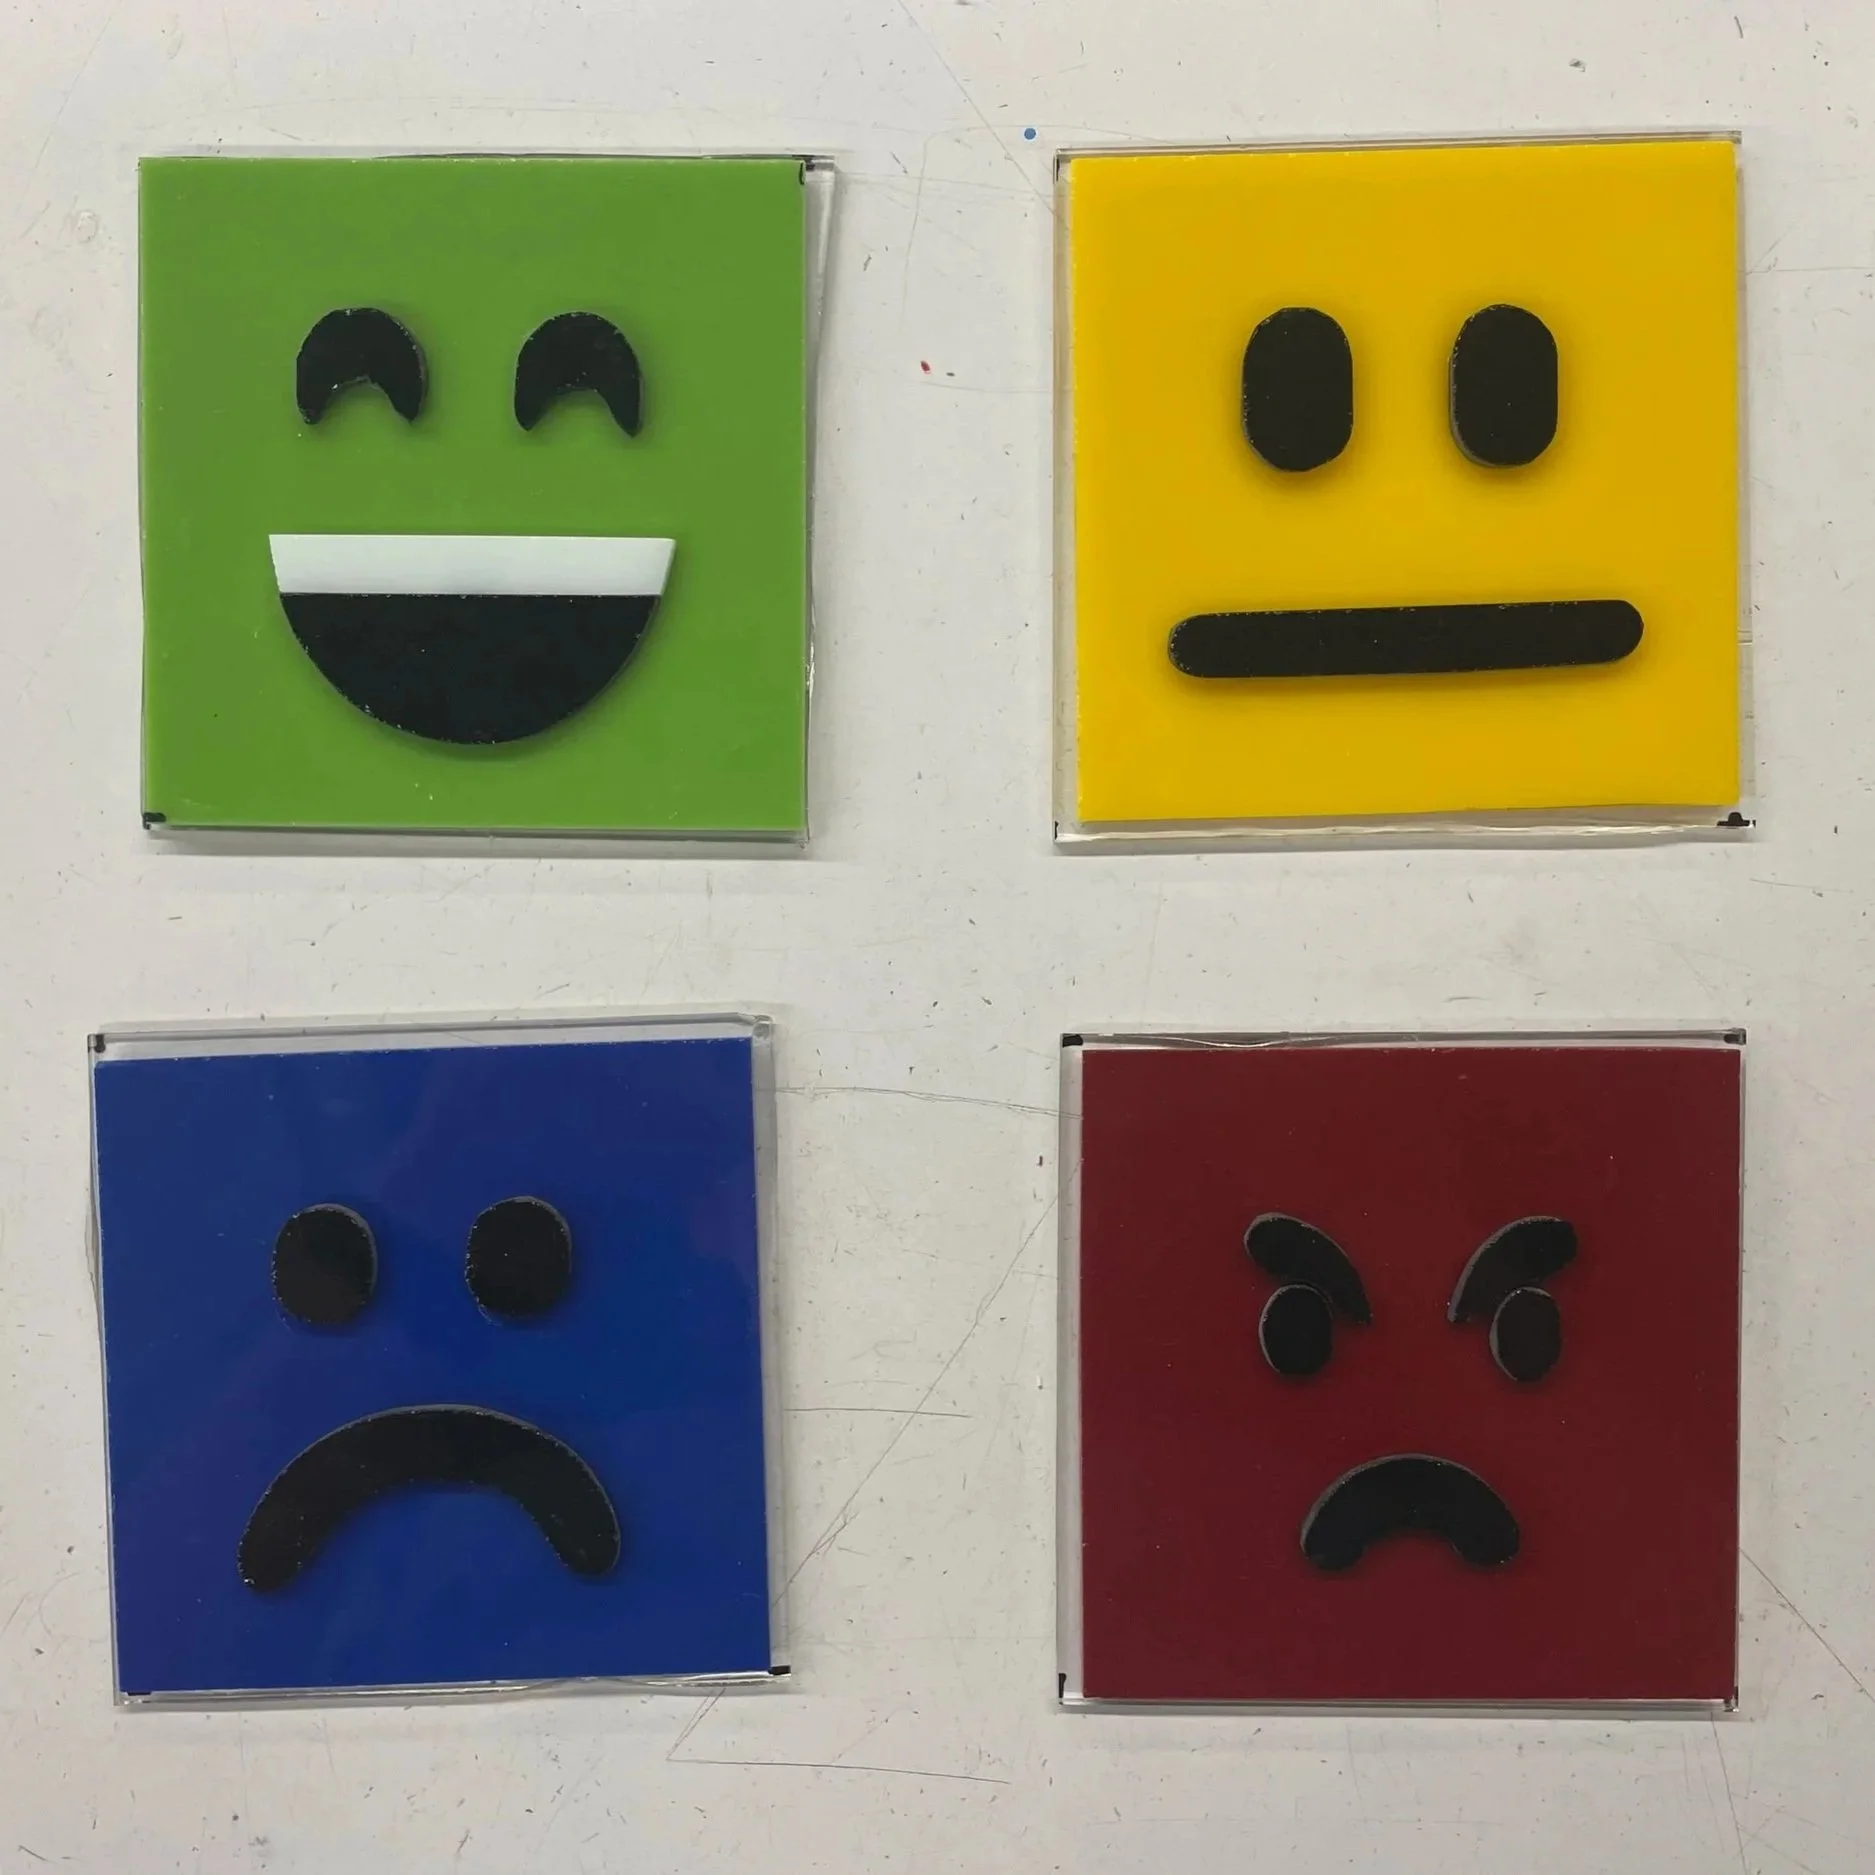
Emoji Squares
Glass Fusing
This was our first assignment with glass fusing. When fusing glass, you first cut and grind down all of your glass pieces and then melt them together in a kiln at around 1500°F.
At that temperature, the surface tension of glass will either pull glass in or make it flow out until the glass is 6mm thick, which is why as you will see, I put pieces of clear glass under each of these emoji squares.
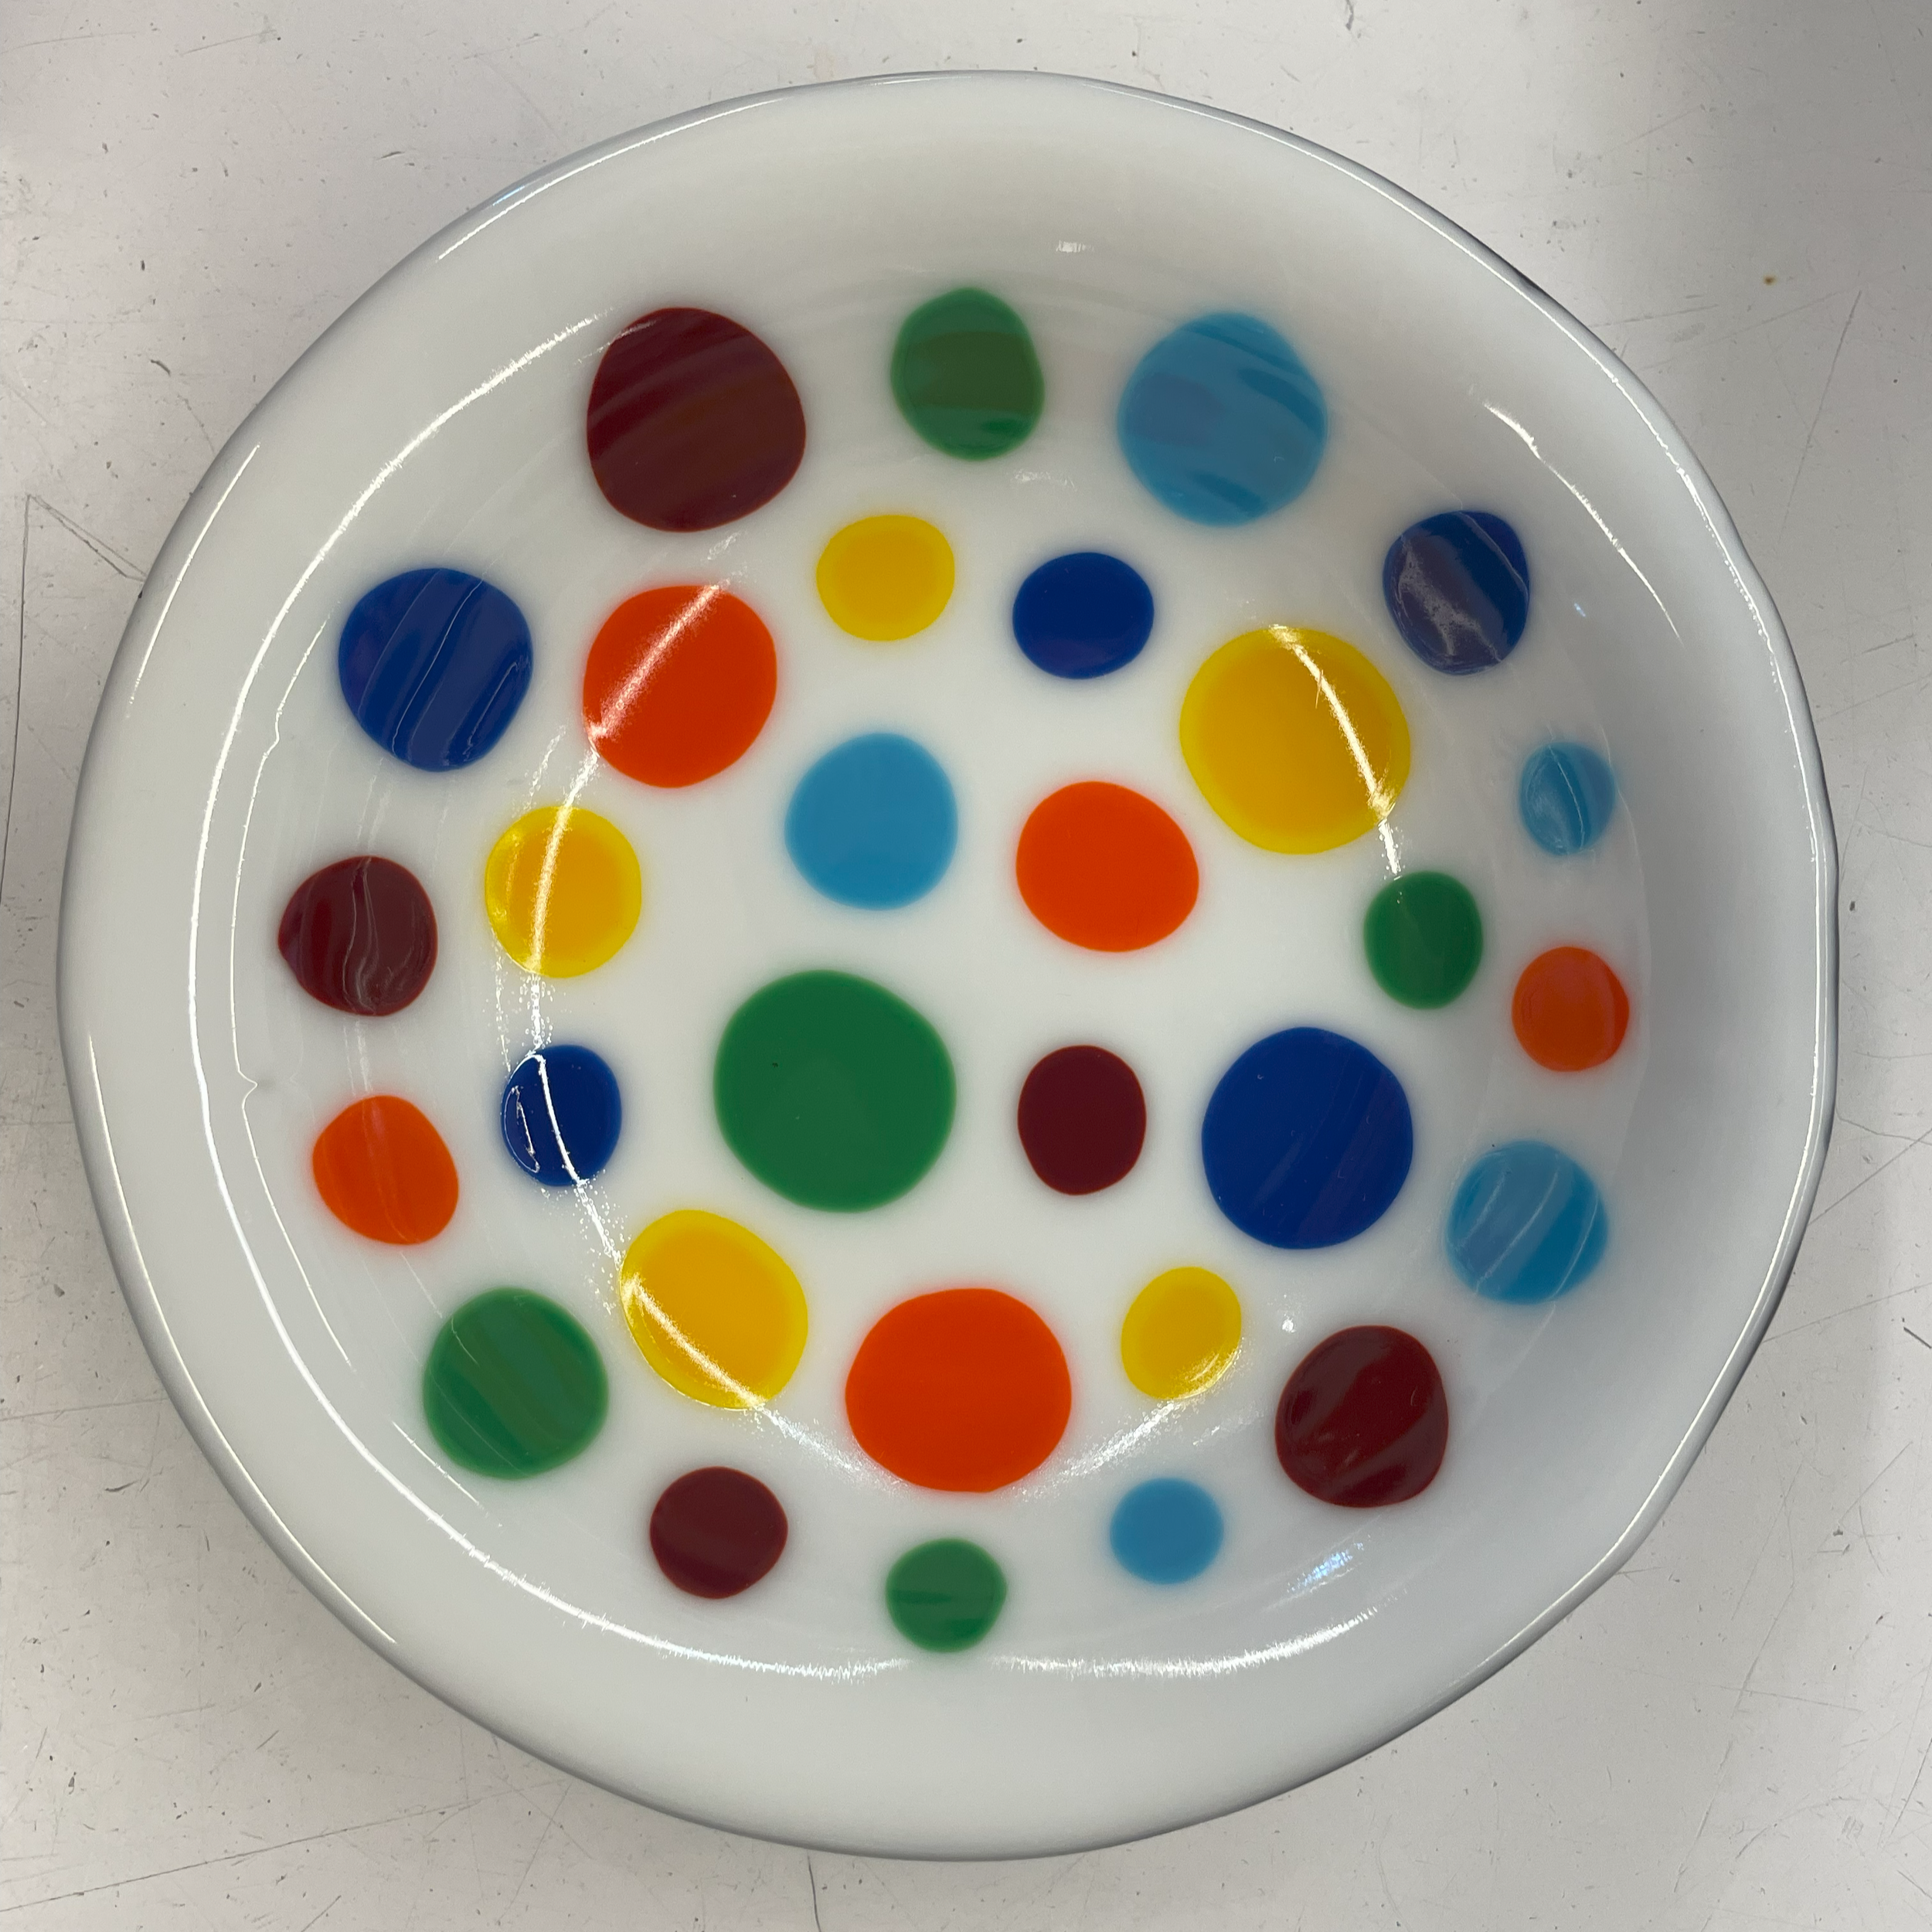
To see another example of fusing, check out the rainbow dotted bowl.
This project was to make four fused shapes that had some common theme. I decided to base mine off of emojis, and this was the sketch of my idea.


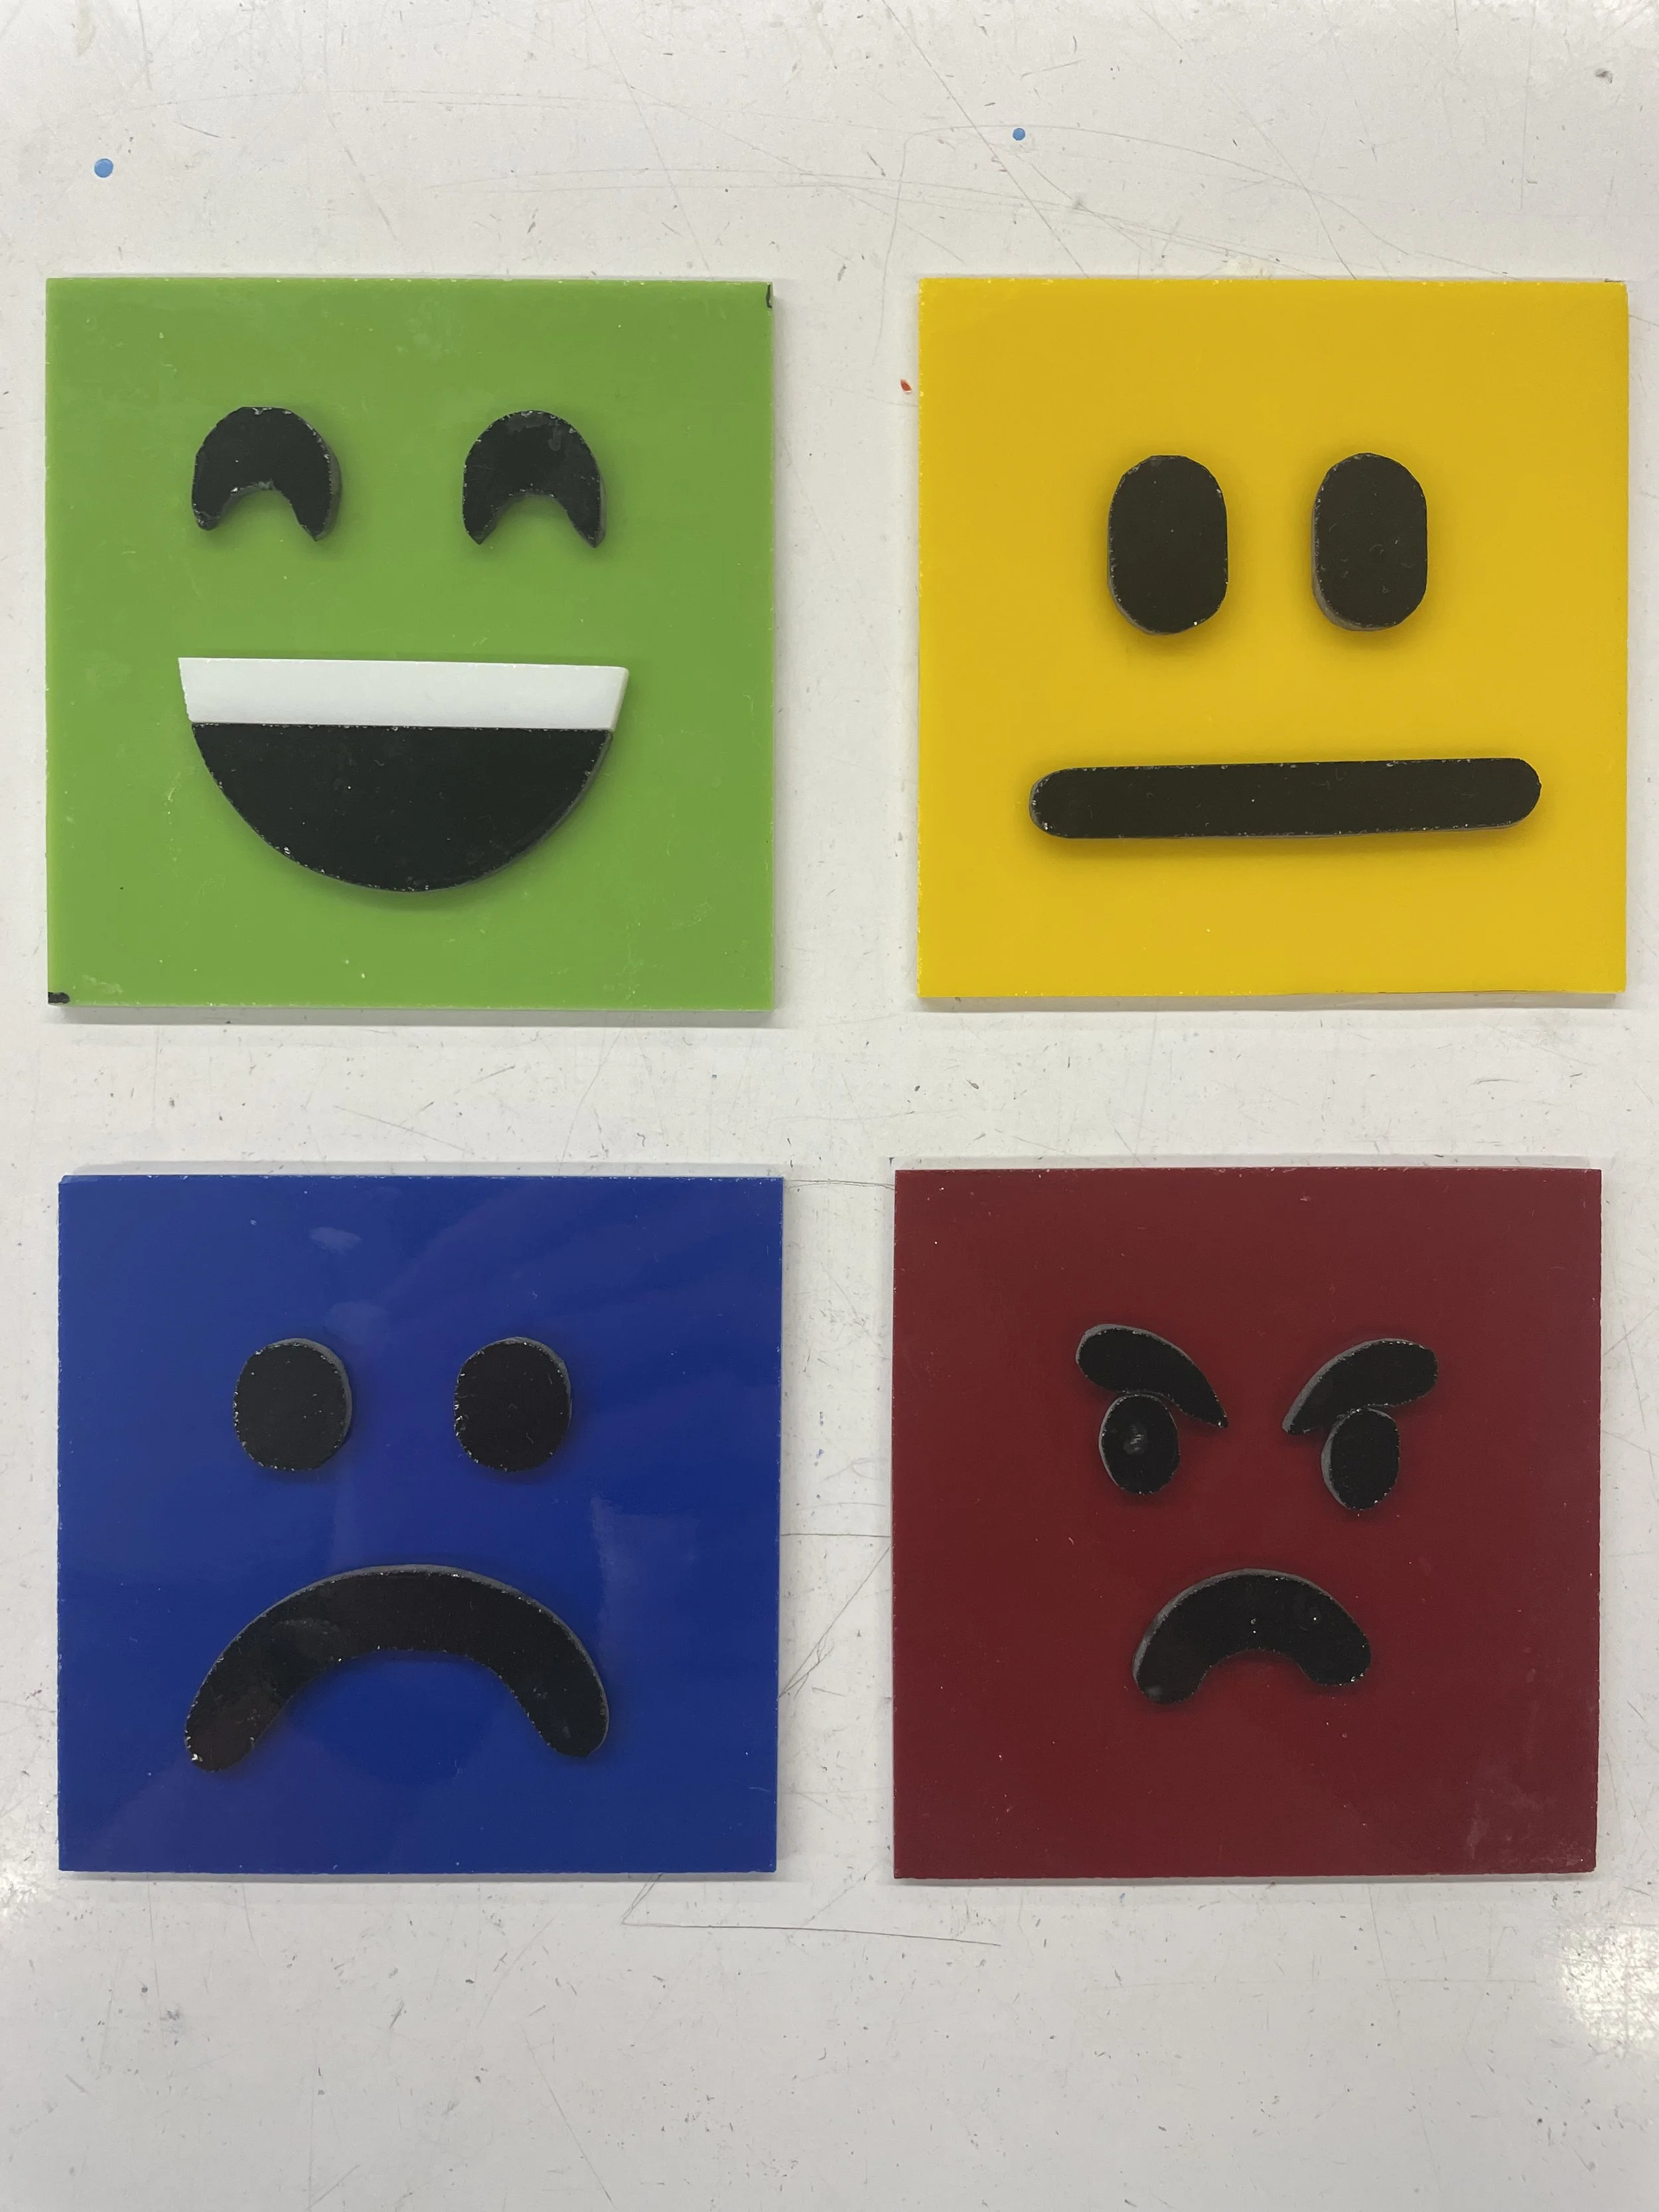
I started with the meh face because I was a bit intimidated by the curves of the other faces mouths and I wanted to practice with this one first.
A progress photo from a little bit later. I started with the faces and then cut squares out of larger sheets of colored glass.

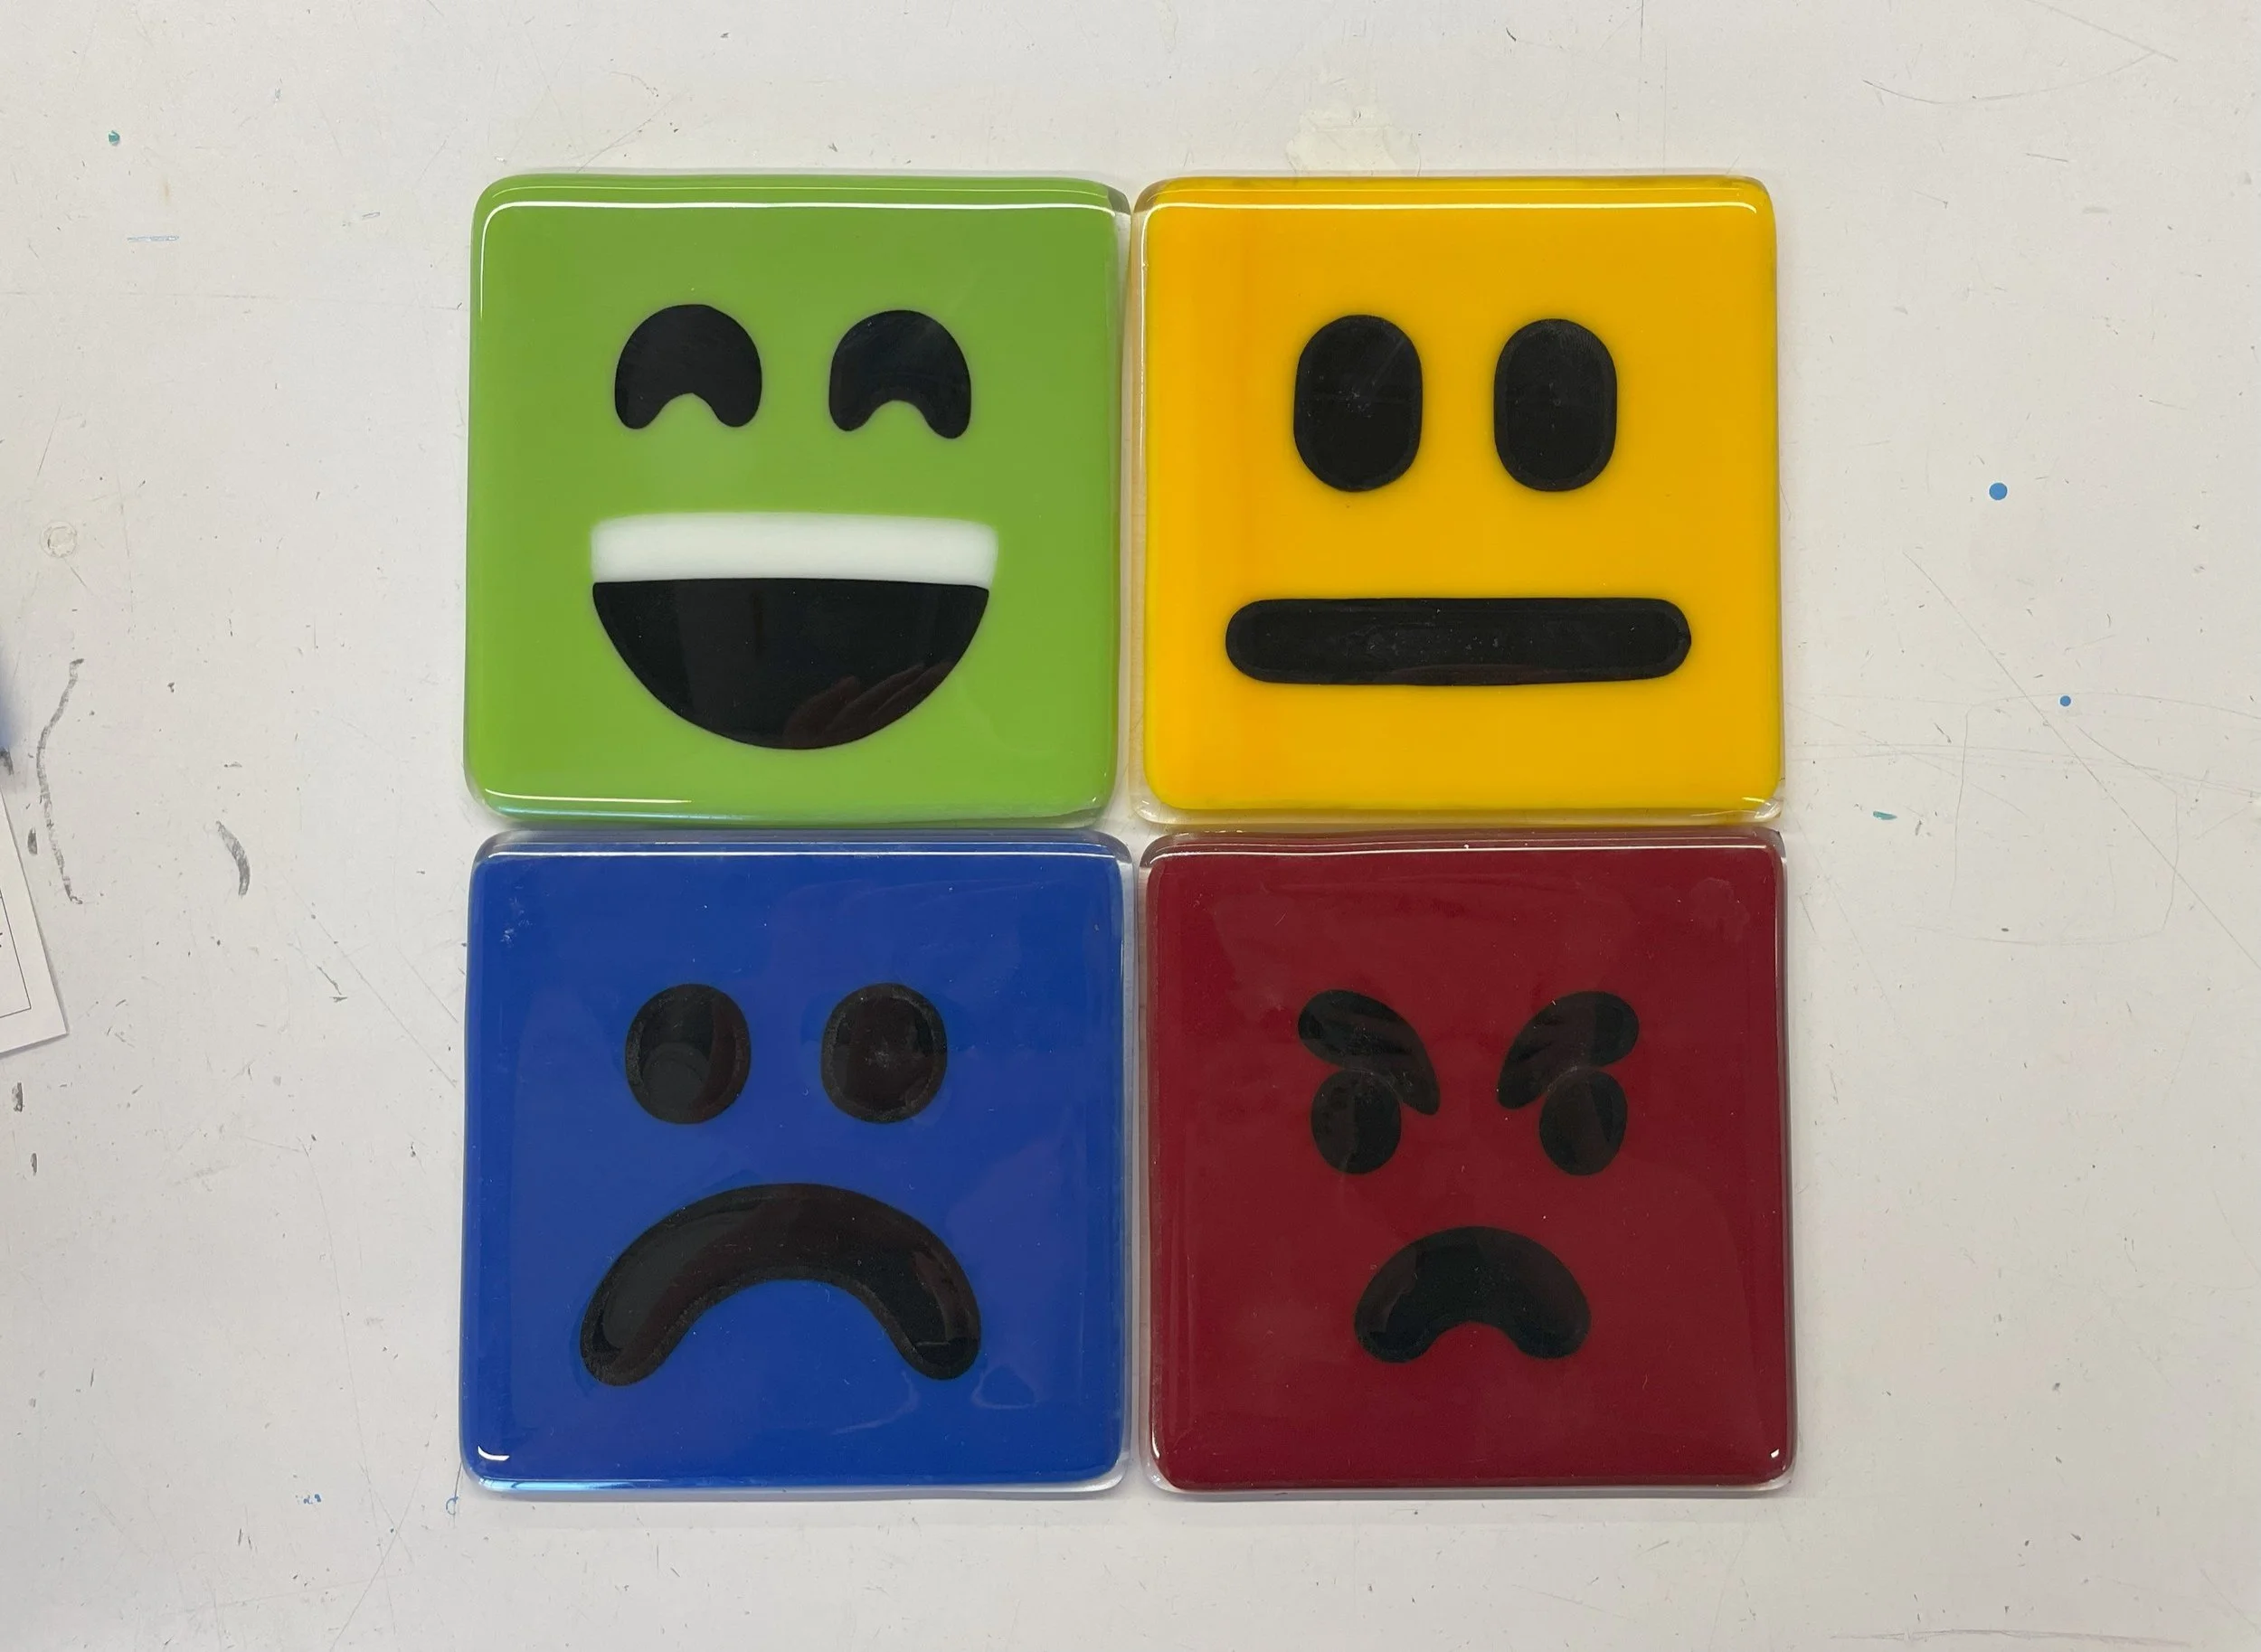
All of the faces completed! But because those colored sheets of glass were only 3mm thick, I still needed to put another piece of glass underneath each of them. (See explanation of 6mm rule above
Now the colored squares have clear glass below them, meaning they are 6mm thick in total and won’t change shape too much. (Note: the faces technically add another 3mm of thickness, but they’re small enough and far enough from the edges that they just melt into the rest without issue.)
This is after the first fuse. But in the kiln, some sort of debris got fused into the left eye of the green square, so I used a dremel to remove it and then fused the green square once more so it looked shiny like the others.

The finished product!